Using Github Actions to deploy an Astro app to S3
If you have trouble viewing the images in this blog post, turn on light mode in the upper right corner of the page.
This blog post, along with this site, are hosted on an AWS S3 bucket. But how do I develop a new blog post, test it out locally, and then deploy those changes to my S3 bucket without manually uploading each file?
No need to wonder. I’ll show you!
1. Create a new user with proper permissions in AWS IAM
First step is to create a user that the Github Actions virtual machine will use programmatically. I wouldn’t recommend to recycle an existing user for this purpose, especially if that user is attached to other services. If something were to go wrong, it would be easy to revoke access from only the Github Actions user without it interfering with any of your other services.
Log into your AWS console and go to the AWS IAM user interface to create a new user.
Once you’ve decided on a cool name, attach the AmazonS3FullAccess policy to this user.
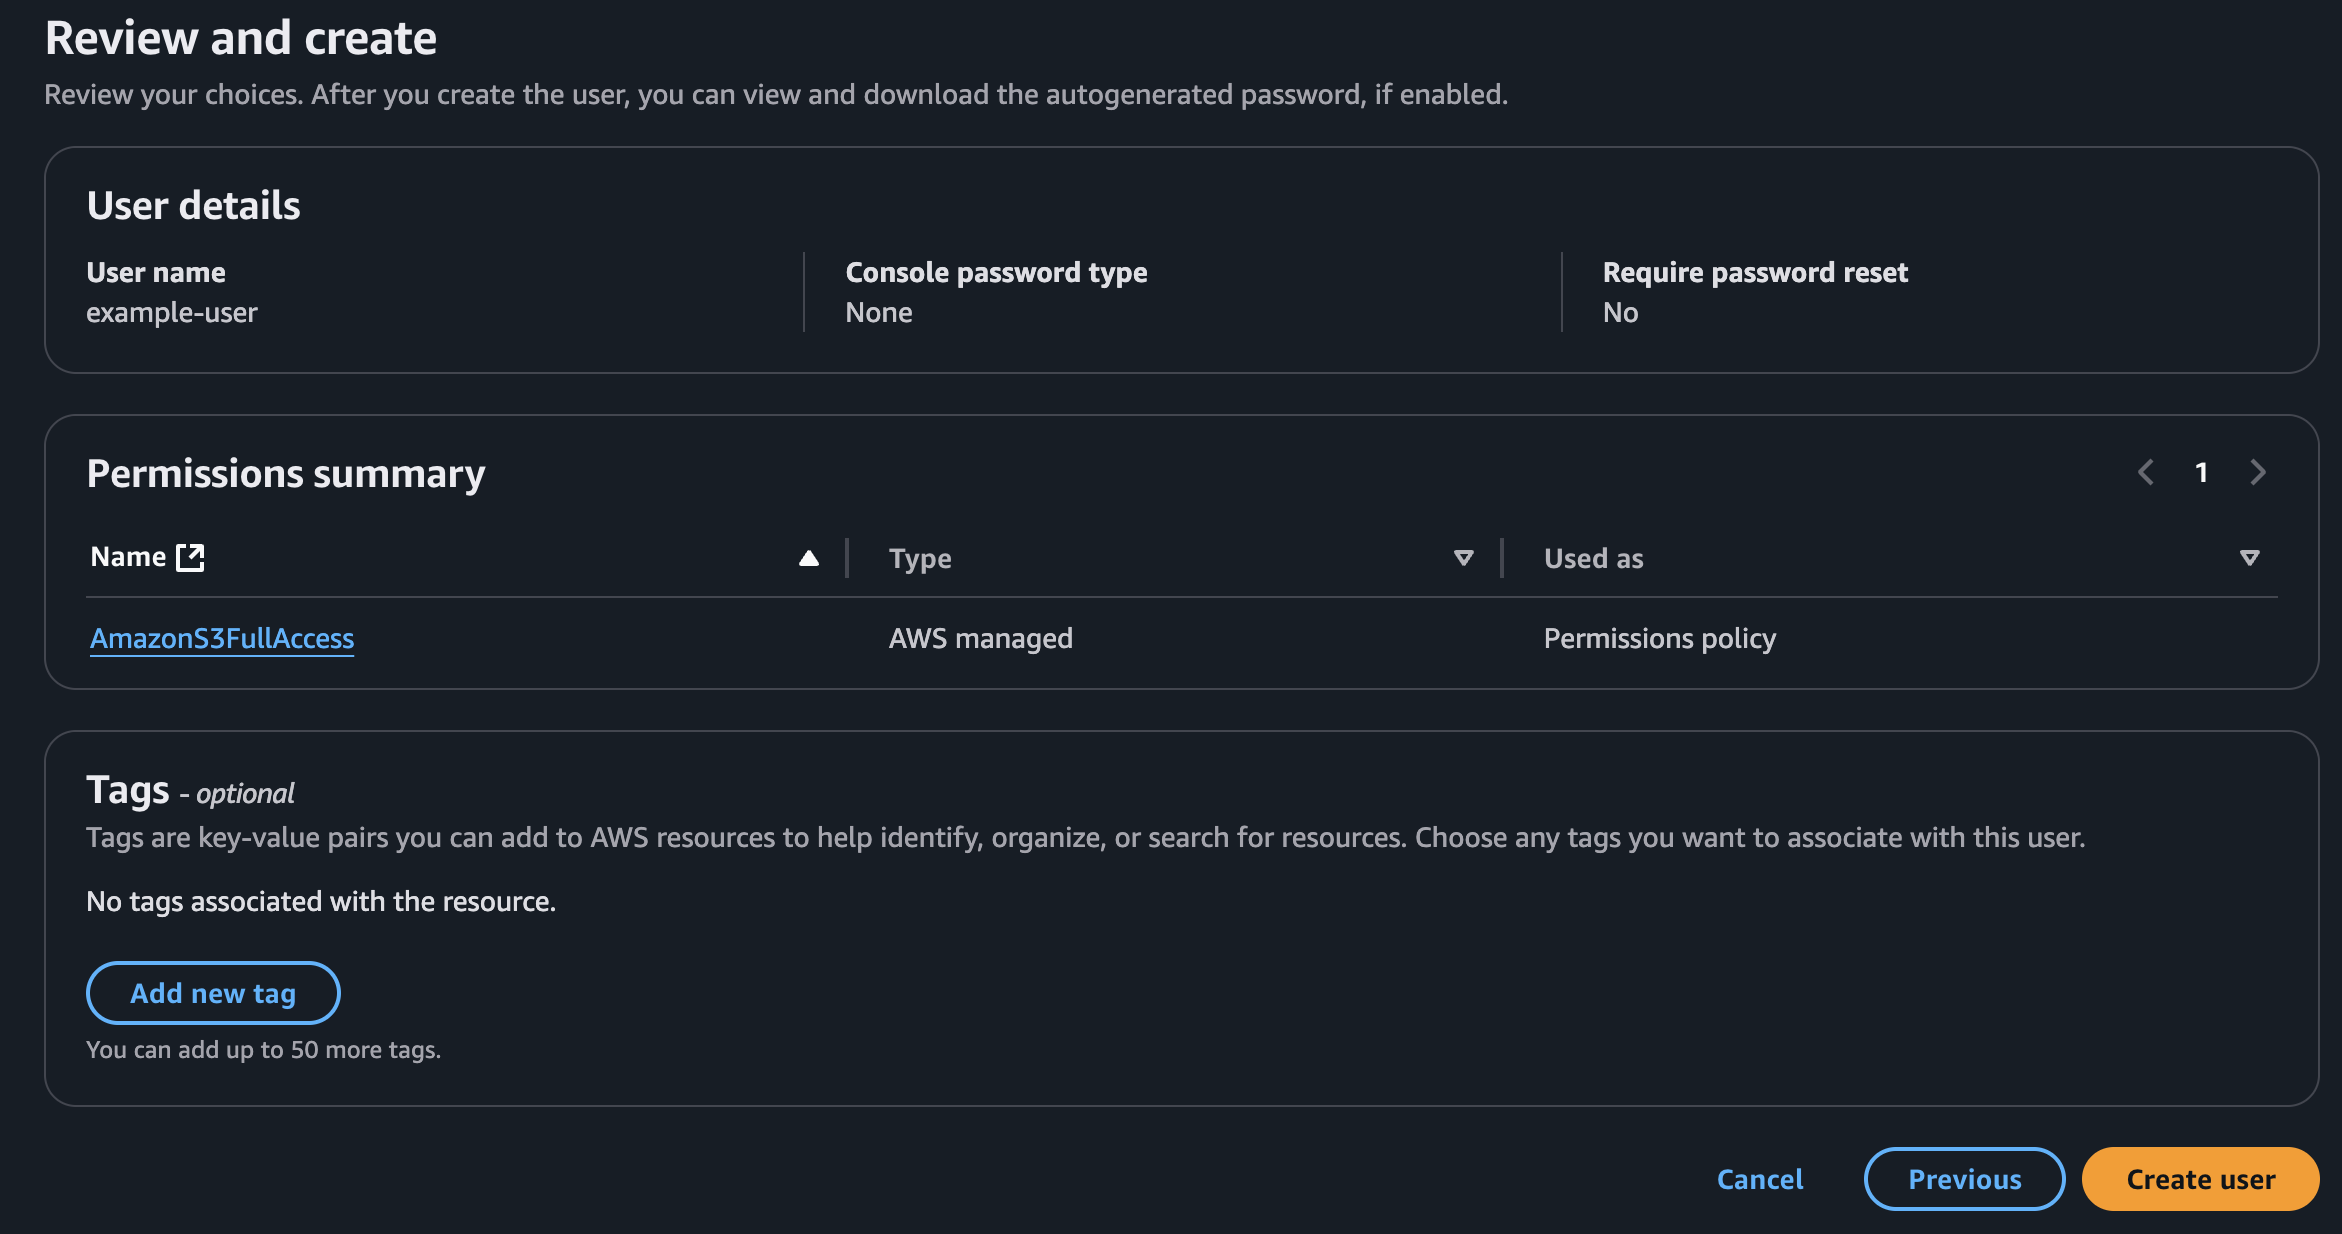
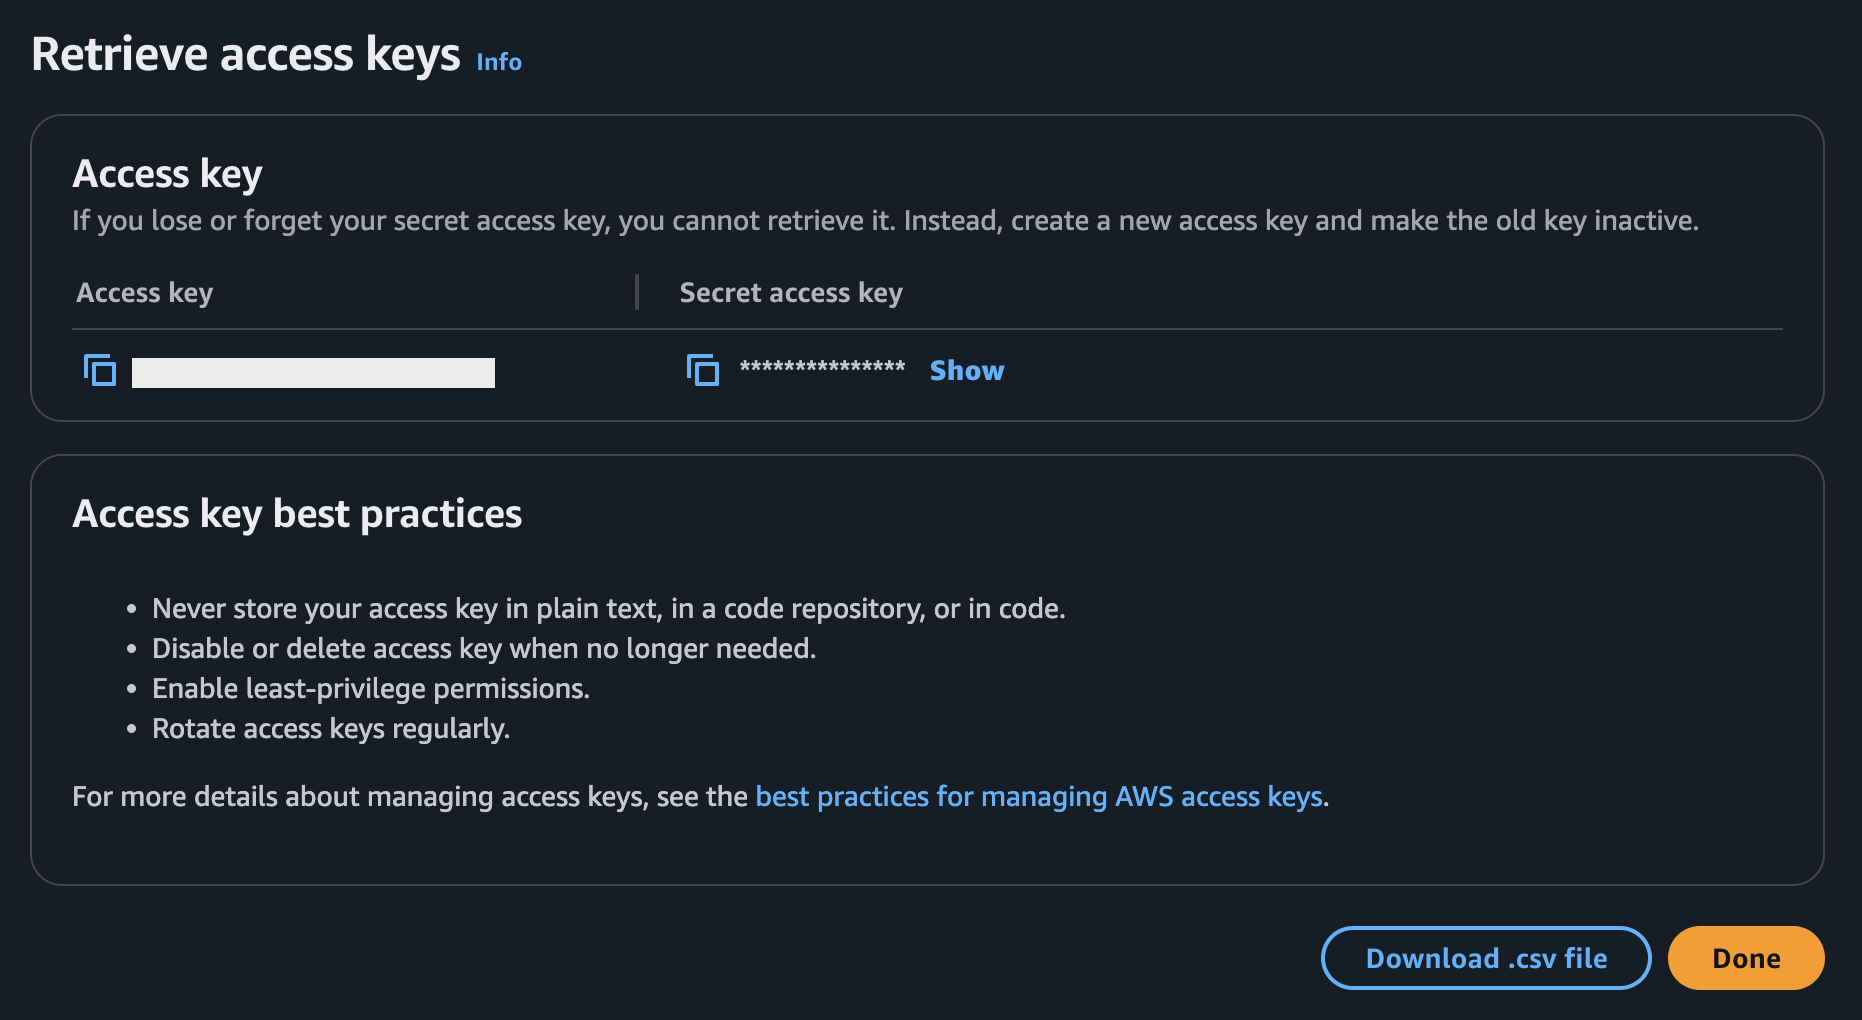
Afterwards, click on Create access key and finish through the dialog box options. Afterwards, copy your access key and secret key.
2. Add AWS access and secret key to your Github repository
After generating your keys, navigate to your Github repository and add your secrets to your repository (Settings > Security > Secrets and variables > Actions).
I named my access key AWS_ACCESS_KEY_ID and my secret key AWS_SECRET_ACCESS_KEY. You can name yours whatever you’d like, just keep it consistent when you add it to your Actions workflow YAML file later.

3. Create a new Actions workflow using YAML file
Caution!
The Post-deployment step below is optional, but was required for my use case. This piece of code will make all of the objects within the S3 bucket public. For my use case, I’m okay with that, but be careful using this code as it will make anything in your bucket public. Please do not use this if you have any sensitive data in your bucket!
To create a Github Actions workflow, add a new YAML file in ./.github/workflows in your repository. I named my file main.yml but you can call it whatever you want.
Here’s the complete .yml file:
name: Deploy website
on:
  push:
    branches:
      - master

jobs:
  deploy:
    runs-on: ubuntu-latest
    steps:
      - name: Checkout
        uses: actions/checkout@v4

      - name: Setup Node
        uses: actions/setup-node@v4

      - name: Cache
        id: cache
        uses: actions/cache@v4
        with:
          path: |
            public
            node_modules
          key: ${{ runner.os }}-cache

      - name: Install Dependencies
        run: npm install astro

      - name: Run Build
        run: npm run build

      - name: Configure AWS Credentials
        uses: aws-actions/configure-aws-credentials@v4
        with:
          aws-access-key-id: ${{ secrets.AWS_ACCESS_KEY_ID }}
          aws-secret-access-key: ${{ secrets.AWS_SECRET_ACCESS_KEY }}
          aws-region: us-east-1

      - name: Deploy static site to S3 bucket
        run: aws s3 sync ./dist s3://${{ secrets.S3_STRING }} --delete

      - name: Post-deployment
        run: |
          output=$(aws s3api list-objects-v2 --bucket ${{ secrets.S3_STRING }} --query "Contents[].Key" --output text)

          for key in $output; do
            aws s3api put-object-acl --bucket ${{ secrets.S3_STRING }} --key $key --acl public-read
          done
The on parameter forces this Action to only run when there is a push to master branch.
The steps below all relate to downloading files to the virtual machine’s local files, caching for efficiency, and creating the build for the deployment.
CheckoutSetup NodeCacheInstall DependenciesRun Build
The Configure AWS Credentials step uses an AWS verified Github Action to authenticate the Github Actions virtual machine with AWS using the previously created user. It’s important to use the same names that you used when you added the secrets to the repository secrets in step 2.
The Deploy static site to S3 bucket step deploys the files in the dist folder in the virtual machine. Remember that dist is the build result created by npm run build. The --delete flag deletes any leftover files in the bucket that do not exist in the source directory.
The S3_STRING secret is nothing but the name of your bucket. I parameterized it, but you do not have to if it’s not a concern for you and your specific use case.
4. Test your new Github Actions pipeline
The YAML file specifies to only trigger the pipeline when a new push occurs to master branch. However, in many enterprise scenarios, you have to go through a pull request review process before merging and integrating your changes to master, so you can remove the trigger or specify something else if you’d like to test your new Github Actions workflow.
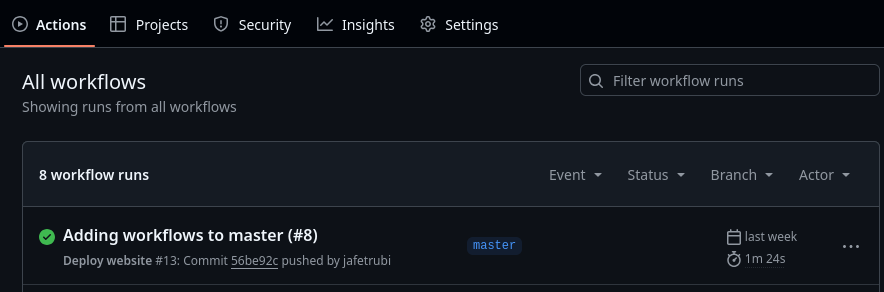
If successful, you should see something like the following in the Actions tab of your repository:
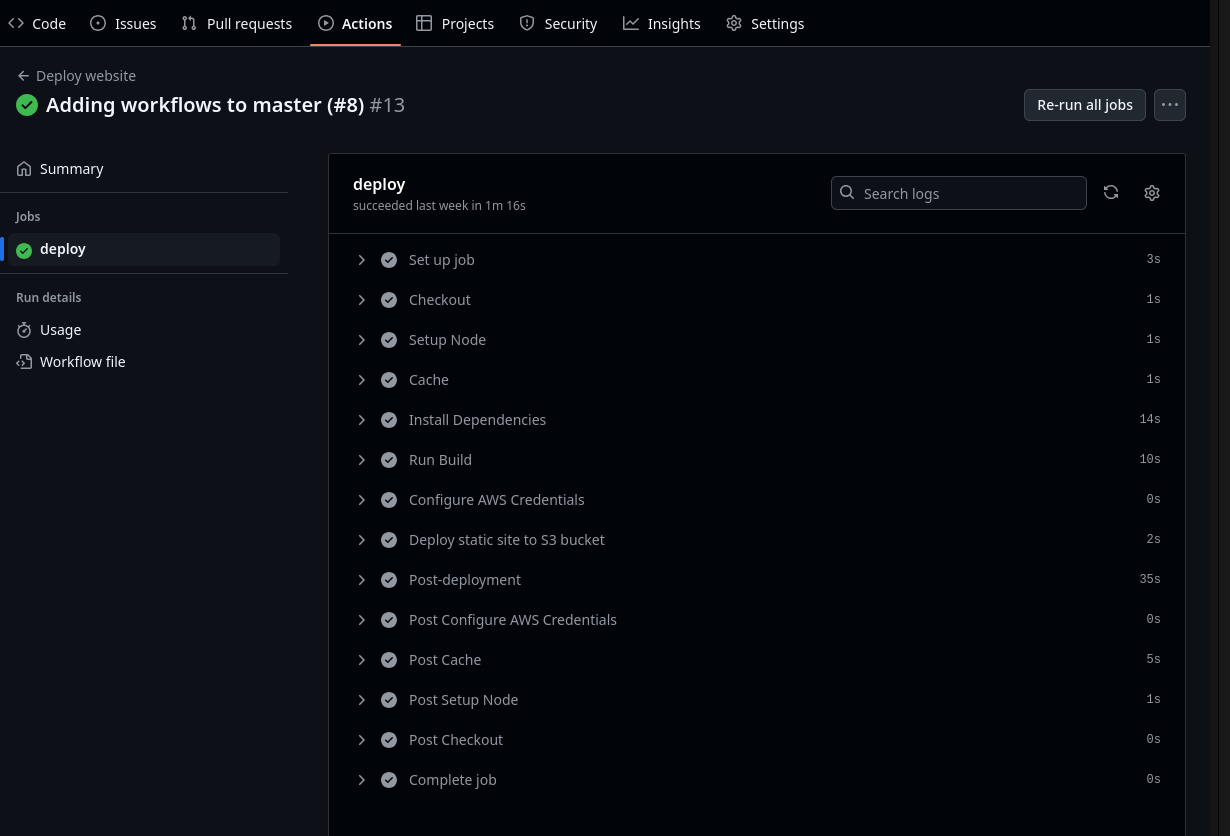
And, for a more detailed look into the workflow, you can click on that specific run:
5. Enjoy the hours saved by going outside or doing something fun
Hope you enjoyed it! Feel free to reach out to me on any of my links on the home page if you run into any trouble following my guide.